Having a properly fitted drain in your kitchen sink is essential for efficient and effective drainage. Learning how to fit a drain for your kitchen sink can save you money and give you the satisfaction of completing a DIY home improvement project. In this article, we will provide a step-by-step guide on how to fit a drain for your kitchen sink, along with useful tips and expert advice.
Key Takeaways:
- Properly fitted drains are essential for efficient and effective drainage in your kitchen sink.
- Learning how to fit a drain for your kitchen sink can save you money and give you the satisfaction of completing a DIY home improvement project.
- This article will provide a step-by-step guide and expert advice on fitting a drain for your kitchen sink.
Essential Tools for Fitting a Drain in Kitchen Sink
If you’re planning to do a DIY kitchen sink drain fitting, having the right tools is essential for a successful installation. From basic tools such as a screwdriver to more specialized items such as a basin wrench, here’s a comprehensive list of essential tools you’ll need:
| Tool | Description |
|---|---|
| Screwdriver | A flat-head or Phillips screwdriver will be needed to loosen screws. |
| Adjustable Wrench | You’ll need an adjustable wrench to tighten or loosen nuts and bolts. |
| Basin Wrench | This specialized wrench is designed for working in tight spaces under the sink. |
| Plumber’s Putty | A pliable substance used to seal gaps and prevent leaks around the drain flange. |
| Plumber’s Tape | Also known as Teflon tape, it is used to ensure a tight seal around threaded plumbing connections. |
| Hacksaw | May be necessary to cut new pipes or to remove old ones during the installation process. |
| Bucket | Used to catch water and debris as you work, preventing messes and making clean-up easier. |
Having all these tools on hand will make the job much easier and more efficient. If you don’t already have them, you can find them at most hardware stores or order them online.
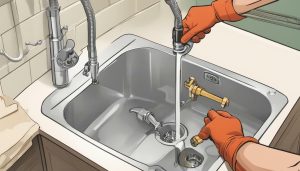
Step 1 – Preparation and Safety Measures
Before starting the drain fitting process, it is essential to prepare the workspace properly and take necessary safety measures to avoid accidents. Follow these steps to ensure a smooth start:
- Clear the area: Remove any objects or debris from the surrounding area to create a clean and organized workspace. This will make the process much easier and safer.
- Protect surfaces: Cover the surrounding surfaces with a drop cloth or plastic sheeting to prevent any accidental scratches or damage.
- Ensure personal safety: Wear protective gloves and safety goggles to prevent injury from sharp tools or debris. Also, be sure to turn off the water supply before starting any work.
Following these safety precautions will ensure a smooth and safe start to the DIY kitchen sink drain fitting process.
Step 2 – Removing the Old Drain
Before installing the new drain, it’s essential to remove the old one. This step requires a bit of elbow grease, but with the right tools and some patience, it can be done quickly and efficiently.
The first step is to disconnect the plumbing. Start by placing a bucket underneath the sink to catch any water that may spill out during the process. Then, use pliers to unscrew the nuts that connect the drain pipes to the sink and the wall.
Once the plumbing is detached, you can remove the old drain from the sink. To do this, you’ll need to loosen the locknut that holds it in place. Use a pair of channel-lock pliers to grip the locknut and turn it counterclockwise until it comes loose. If the locknut is stubborn, try applying some penetrating oil to loosen it.
With the locknut removed, you can lift the old drain out of the sink. You may need to twist it a bit to break any sealant or putty that’s holding it in place. Be sure to clean any leftover putty or debris from the sink surface.
Removing the old drain is an important step in the process of fitting a new drain for your kitchen sink. By following these drain fitting tips for kitchen sinks and this step-by-step guide for fitting a drain in kitchen sink, you’ll be one step closer to a fully functional and leak-free sink drain.
Step 3 – Installing the New Drain
Now that you have removed the old drain, it’s time to install the new one. Follow these simple steps to ensure a successful installation:
-
Apply plumber’s putty around the underside of the drain flange. This will help create a watertight seal once the drain is in place.
-
Insert the drain flange into the sink’s drain opening. Apply pressure to seal the putty and keep the flange in place.
-
Insert the gasket and washer onto the drain tailpiece and push it through the opening in the flange. Secure the assembly with a mounting nut and tighten it with pliers or a wrench.
-
Attach the slip nut and washer to the drain tailpiece and tighten it to the drainpipe located under the sink. Make sure not to overtighten as this can cause damage.
-
Connect any additional pipes or fittings necessary to complete the installation, following the manufacturer’s instructions.
-
Turn on the water and test the drain for leaks. If you notice any leaks, try tightening the connections. If the leak persists, take apart the connections and check for damage to the gaskets or washers. Replace as needed.
Following these steps should result in a properly installed kitchen sink drain. Make sure to consult the manufacturer’s instructions if you encounter any issues or have questions.
Tip: It’s always a good idea to have a helper when installing a kitchen sink drain. They can hold the pieces in place from above while you secure them below.
Step 4 – Testing and Adjusting the Drain
Once the new drain has been installed, it’s crucial to test it for leaks and make any necessary adjustments. Follow these steps to ensure the drain is functioning correctly:
- Run water through the sink and check for proper drainage. If the water drains slowly, it may indicate a clog in the plumbing and will need to be addressed before proceeding.
- Inspect all connections for leaks. Look for any dripping water or moisture around the plumbing pipes and tighten connections as necessary.
- If leaks are still present, disassemble the connections and check for a faulty gasket or improper alignment. Make adjustments and reconnect the pipes.
- Re-test the drain by running water through the sink again. Repeat steps 2-3 if needed until all leaks have been fixed and the drain is functioning correctly.
It’s important to note that improper installation can lead to leaks, which can cause water damage and mold growth. Testing and adjusting the drain is a critical step to ensure a safe and functional kitchen sink.
Refer to a kitchen sink drain plumbing guide if you encounter any issues during this step, or consult with a professional plumber if needed.
Step 5 – Finishing Touches and Clean-up
With the new drain successfully installed, it’s time to add the finishing touches and clean up the workspace. This step is crucial to ensure the longevity and proper functionality of your new drain.
Start by tightening all connections, making sure everything is secured in place. Next, use a silicone sealant to fill in any gaps around the edges of the drain flange. This will prevent water from leaking out and potentially causing damage to your kitchen cabinets.
Once the sealant is applied, wipe away any excess with a cloth. This will help create a neat and tidy finish to your installation. Finally, give your sink area a good clean-up, disposing of any debris and wiping down any surfaces that may have come into contact with the installation process.
Following these kitchen sink drain assembly instructions will ensure that your newly fitted drain is fully functional, leak-free, and aesthetically pleasing. With these final steps complete, you can now enjoy the peace of mind that comes with a successful DIY project.
Expert Advice on Fitting a Kitchen Sink Drain
If you’re new to DIY plumbing, fitting a kitchen sink drain may seem like a daunting task. Fortunately, with the right tools and some expert advice, it’s a project that can be done quickly and easily. Here are some tips from professionals to help you achieve a successful installation:
- Take your time: Rushing the installation process is one of the biggest mistakes homeowners make when fitting a kitchen sink drain. Take your time and follow each step carefully to ensure a proper installation.
- Use the right tools: Having the right tools on hand is essential for a successful installation. Some essential tools include a basin wrench, channel locks, and plumber’s putty.
- Pay attention to details: Paying attention to details such as the position of the drain flange and the direction of the plumbing pipes can prevent leaks and ensure proper drainage.
- Test for leaks: After installing the drain, it’s important to test for leaks to ensure that everything is functioning properly. Use a bucket to catch any water that leaks out and make any necessary adjustments before sealing everything up.
By keeping these tips in mind and taking the time to do the job right, you can achieve a professional-looking installation that will provide you with years of worry-free use.
Benefits of DIY Kitchen Sink Drain Fitting
Opting for a DIY kitchen sink drain fitting can provide several benefits for homeowners. Here are some of the advantages you can expect:
- Cost savings: By taking on the task yourself, you can avoid paying for professional installation fees. This can help you save money on your home improvement projects and allow you to allocate those funds to other necessary repairs or upgrades.
- Satisfaction: Completing a DIY project can give you a sense of accomplishment and pride. Fitting a kitchen sink drain may seem like a small task, but it can make a big difference in the overall look and functionality of your kitchen.
- Learning new skills: Taking on a DIY project can also help you learn new skills and gain experience in home improvement. The knowledge and techniques you acquire can be applied to future projects and may even help you tackle more complex tasks in the future.
Overall, fitting a kitchen sink drain on your own can be a rewarding and beneficial experience, regardless of your skill level or experience with DIY projects.
Conclusion
Fitting a drain for your kitchen sink may seem like a daunting task, but with the right tools and instructions, it’s a DIY project that anyone can tackle. By following the step-by-step guide provided in this article, you can achieve a successful installation and enjoy the benefits of a properly functioning drain.
Remember to take the necessary safety precautions and use the essential tools outlined in Section 2. Be patient and take your time as you work through each step, and don’t hesitate to seek expert advice if needed.
Start Saving Money Today!
By doing a DIY kitchen sink drain fitting, you’ll not only save money, but you’ll also feel a sense of accomplishment in completing a home improvement project. Plus, you may even discover a new skill or hobby along the way!
Don’t let a faulty drain slow you down in the kitchen. With the knowledge and skills gained from this article, you can confidently tackle the task of fitting a drain in your kitchen sink.
FAQ
Q: What are the benefits of fitting a drain for your kitchen sink?
A: Fitting a drain properly ensures proper drainage and prevents clogs in your kitchen sink. It also helps to maintain a sanitary and clean environment in your kitchen by preventing the accumulation of food waste and debris.
Q: What tools do I need to fit a drain in my kitchen sink?
A: The essential tools for fitting a drain in a kitchen sink include a wrench, plumber’s putty, a screwdriver, pliers, a pipe cutter, and a tape measure.
Q: What safety measures should I take when fitting a drain in my kitchen sink?
A: When fitting a drain in your kitchen sink, it is important to wear protective gloves and eye goggles to prevent any injury. Make sure to also turn off the water supply and disconnect the power to any nearby electrical outlets before starting the installation.
Q: How do I remove the old drain from my kitchen sink?
A: To remove the old drain, you will need to disconnect the plumbing connections underneath the sink, loosen the nuts holding the drain in place, and then gently pull out the old drain. It is important to clean the sink surface thoroughly after removing the old drain.
Q: How do I install the new drain in my kitchen sink?
A: To install the new drain, apply plumber’s putty to the underside of the drain flange, insert it into the sink opening, and tighten the retaining nuts underneath. Once the flange is secured, connect the plumbing pipes using appropriate fittings and tighten them with a wrench.
Q: How do I test and adjust the newly installed drain in my kitchen sink?
A: After installing the drain, run water through the sink to test for any leaks. If leaks are found, tighten the connections or apply additional sealing material as needed. Ensure that water drains properly from the sink and make any necessary adjustments to ensure proper functionality.
Q: What are the final steps and clean-up processes after fitting a drain in my kitchen sink?
A: The final steps include tightening all connections, sealing any gaps to prevent leaks, and cleaning up any debris or leftover materials. Ensure that the sink is properly functioning and free of any leaks before completing the clean-up process.
Q: Do you have any expert advice on fitting a kitchen sink drain?
A: Experts recommend thoroughly reading the manufacturer’s instructions before starting the installation process. It is also advisable to consult a professional plumber if you are unsure about any aspect of the installation or encounter any difficulties.
Q: What are the benefits of DIY kitchen sink drain fitting?
A: DIY kitchen sink drain fitting offers cost savings compared to hiring a professional. It also provides a sense of accomplishment and allows you to learn new skills while improving your home’s functionality.

It’s me, Amber Hayden, the heart and soul behind SagarmathaOnlineMedia.com. From a young age, I’ve been head over heels for everything home-related, from interior decor to gardening. I’m the type who can’t resist a well-crafted piece of furniture, and I firmly believe that a home isn’t complete without a pet or two. But it’s not just about creating pretty spaces for me. I’m all about making homes that tell a story reflecting the people living there. SagarmathaOnlineMedia.com is my way of sharing this passion with you. Whether you’re looking for tips to jazz up your living room, advice on pet care, or ideas to make your garden bloom, I’m here to help. So, let’s embark on this journey together and make your house a home!