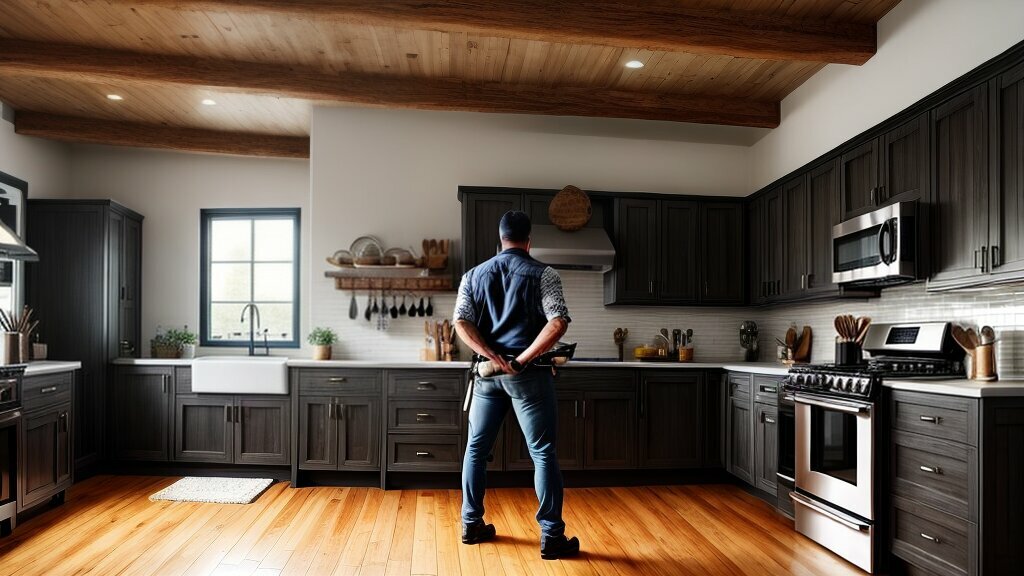
Welcome to our comprehensive guide on hanging up kitchen cabinets. Whether you are renovating your kitchen or looking to upgrade its storage solutions, this article will provide a step-by-step guide on hanging up kitchen cabinets, including expert tips and techniques.
As a professional copywriting journalist, I collaborated with expert artisans and DIY enthusiasts to give you a thorough overview of the cabinet installation process. Following our instructions and tips, you can transform your kitchen space without expensive professional help.
Proper cabinet installation is crucial for the functionality and aesthetics of your kitchen. By ensuring that your cabinets are installed correctly, you can avoid potential hazards, such as cabinets falling off the wall, and maximize the available space in your kitchen.
Key Takeaways
- Proper cabinet installation is crucial for the functionality and aesthetics of your kitchen.
- Following our step-by-step guide and utilizing our expert tips and techniques, you can hang up kitchen cabinets without professional help.
- Maximize the available space in your kitchen by ensuring that your cabinets are installed correctly.
Preparing for Cabinet Installation
Before starting the cabinet installation process, preparing the space properly is essential. Measuring and marking the wall accurately will ensure the cabinets are hung securely and look visually appealing.
If you are replacing existing cabinets, it’s essential to remove them carefully, as this will prevent damage to the wall surface. If it’s a new installation, ensure the wall surface is clean and debris-free.
Here are some tips for preparing for cabinet installation:
- Measure the height and width of the area where the cabinets will be hung.
- Mark the center line of the space using a chalk line or a laser level.
- Locate and mark any electrical outlets, plumbing, or gas lines.
- If replacing existing cabinets, remove them carefully to avoid damaging the wall surface.
- If it’s a new installation, ensure the wall surface is clean and debris-free.
Gathering the Necessary Tools and Materials
Before you start installing your kitchen cabinets, make sure you have all the necessary tools and materials at hand. Here’s a comprehensive list to ensure a smooth installation process:
| Tools | Materials |
|---|---|
| Measuring tape | Cabinets |
| Level | L-brackets |
| Miter saw | Screws |
| Hammer | Drill |
| Screwdriver | Wall studs or toggle bolts |
| Drill bit set | Wood shims |
| Caulk gun and caulk | Trim or filler pieces (if needed) |
It’s important to differentiate between the tools and materials required for hanging upper cabinets and those needed for base cabinets.
Tip: We recommend keeping all the tools and materials in the same area so they are easy to access during installation. Also, make sure to double-check that you have everything on the list before starting to install the cabinets.
Assembling the Cabinets (If Applicable)
If your cabinets require assembly, putting them together correctly before beginning installation is essential. We recommend following the manufacturer’s instructions for assembly, as each brand and model may have specific requirements.
When assembling your cabinets, ensure you have all the necessary tools and equipment to complete the job. This may include a drill, screwdriver, hammer, level, and clamps.
Once you have assembled your cabinets, double-check that all the parts fit correctly. Verify that all screws and bolts are securely fastened, and carefully inspect for any components that might be loose and could potentially compromise the cabinet’s stability.
If you encounter any issues during the assembly process, refer to the manufacturer’s instructions or seek assistance from a professional.
Finding and Marking Studs in the Wall
BeforeBefore installing kitchen cabinets, it’s essential to accurately identify and mark the wall studs. This ensures the cabinets are securely anchored and can support their weight and contents over time. Here’s how you can find and mark the studs on your kitchen wall:
- Start by using a stud finder tool to locate the studs. Place the stud finder against the wall and move it horizontally until it detects a stud. Indicate the stud’s position using a pencil or masking tape.
- You can still locate the studs manually if you don’t have a stud finder. Look for small indentations or nail heads in the wall, which indicate the location of the studs. You can also use a level to check for any slight bumps or deviations in the wall surface, which the presence of a stud may cause.
- Once you have marked the location of the first stud, measure 16 inches to the left or right of it, depending on the standard spacing for your wall studs. Mark the resulting location with a pencil or tape, then measure another 16 inches in the same direction to locate the next stud. Repeat this process until you have marked the position of all the studs you need for your cabinet installation.
Remember to double check your measurements and marking before starting the cabinet installation process to ensure accurate placement and secure attachment of your kitchen cabinets.
Installing the Upper Cabinets
Now that we are done with the preparation work and have the necessary tools and materials ready, it’s time to start hanging the upper cabinets. Adhere to these steps to ensure a seamless and successful installation procedure:
- Use a ledger board: Take a long board and attach it to the wall at the height where you want the bottom of your upper cabinets to be. This board will support the cabinets while you work on attaching them to the wall. Use a level to ensure the board is straight and secure it to the wall using screws.
- Mark the cabinet placement: Use a measuring tape to mark the placement of each cabinet on the ledger board. Make sure to leave enough space between cabinets for appliances or other features. Use a pencil to mark the position of the cabinets on the board.
- Attach the cabinets: With the help of a friend, lift the first cabinet onto the ledger board and align it with the pencil markings. Use a level to ensure it’s straight, then attach it to the wall by driving screws into the studs through the back panel and support rail. Repeat this process for the remaining cabinets, leveling each as you go.
- Secure the cabinets together: Once they are attached to the wall, use screws and brackets. Place the screws through the side panels of adjacent cabinets and into the adjoining panel.
- Adjust the doors: With the cabinets securely in place, it’s time to adjust the cabinet doors. Use a screwdriver to adjust the height and position of the doors until they align correctly. Make sure to perform this step carefully to avoid damage to the doors or the cabinet frame.
Following these steps, you can hang your upper cabinets like a pro. Take time with the process; check for levelness and proper alignment as you work.
Mounting the Base Cabinets
Now that the upper cabinets are securely attached to the wall, it’s time to mount the base cabinets. Start by measuring and marking the same height on the wall as the bottom of the upper cabinets. This will ensure that the base cabinets are level with the upper ones, and the countertop will sit flush across all the cabinets.
Next, place the base cabinets against the wall and use a level to make sure they are straight and level. Adjust the height of the legs as necessary to ensure that each cabinet is level and flush with the adjacent cabinets. If you encounter an uneven floor, use shims to level the cabinets.
Secure the base cabinets to the wall studs using screws and brackets. Remember to pre-drill holes to avoid splitting the wood. Once the base cabinets are securely attached, use clamps to hold them together and drill pilot holes for screws to secure them together.
Adjusting for Appliances
If you install appliances, such as a stove or refrigerator, you must adjust the cabinets to accommodate them. Measure the appliance, and then use those measurements to mark the corresponding areas on the cabinets.
Use a jigsaw or reciprocating saw to cut out space for the appliance. Always adhere to the manufacturer’s guidelines and safety precautions when making cuts into the cabinet material.
Once the cabinets are adjusted for appliances, reattach any removed doors or drawers for easier access.
With the base cabinets securely attached to the wall and each other and adjusted for any appliances, it’s time to move on to securing the cabinets together and adding the finishing touches.
Securing Cabinets Together and Adding Finishing Touches
Once the upper and base cabinets are securely attached to the wall, it’s time to make them into one cohesive unit. This is achieved by securing cabinets together both vertically and horizontally.
Note: Before initiating this process, ensure all cabinets are level and firmly affixed to the wall.
To secure upper cabinets together, use screws or brackets to attach them through the sides or backs of the cabinets. For base cabinets, use a combination of screws and brackets to secure the cabinets together.
If your cabinets have filler pieces or trim, now is the time to add them. This step will help create a seamless and polished finish to your cabinets. Use a level to ensure all pieces are straight and level before attaching them with screws or adhesive.
Checking for Level and Adjustments
Now that the upper and base cabinets are securely attached to the wall, it’s time to check for levelness. Using a level, ensure the cabinets are level horizontally and vertically. If any adjustments need to be made, use shims or adjust the screws accordingly.
For upper cabinets, check that they are level with each other and properly aligned. Use a long straightedge or a laser level to ensure the cabinets are straight.
For base cabinets, check that they are level with each other and the countertops. Adjust the leveling legs as needed to ensure a uniform surface for the countertop.
Additional Adjustments
If you notice any gaps between the cabinets or between the cabinets and the wall, use filler strips to fill them in. You can cut these strips to size and attach them using a nail gun or screws.
If any cabinets are not flush with the wall or the doors are not closing correctly, make additional adjustments as necessary. This may involve loosening and repositioning the cabinets or adjusting the hinges and hardware.
Remember, it’s essential to take the time to make these final adjustments to ensure a professional-looking installation. Proper adjustments and attention to detail make your kitchen cabinets beautiful and functional for years.
Final Steps and Safety Precautions
After successfully installing your kitchen cabinets, there are some final steps and safety measures to consider to achieve a polished and functional outcome.
Attaching Cabinet Doors, Drawers, and Hardware
After securing the cabinets, it is time to attach the doors, drawers, and hardware. Make sure to follow the manufacturer’s instructions for proper attachment and alignment. This step is crucial in achieving a cohesive and attractive finish.
Safety Precautions
It is essential to secure the cabinets to prevent tipping—anchor base cabinets to the wall with L-brackets or cabinet screws. For upper cabinets, use a French cleat or metal rail for reinforcement.
Additionally, ensure proper weight distribution of items within the cabinets to prevent imbalance and instability. Place heavy items on the bottom and lighter items on the top shelves.
Maintenance Tips
To maintain the functionality and durability of your kitchen cabinets, clean them regularly with a mild cleaner and a soft cloth. Avoid abrasive cleaners or scrubbers that may damage the finish.
Frequently examine your cabinets for indications of wear or damage, and swiftly address any issues that arise by performing necessary repairs. This will help prolong the life of your cabinets and keep them looking as good as new.
Following these final steps and safety precautions ensures your kitchen cabinets are installed securely and functioning optimally.
Cleaning Up and Enjoying Your New Kitchen Cabinets
After successfully installing your new kitchen cabinets, it’s time to clean up and start enjoying your transformed space! First, be sure to remove any debris and clean up your workspace. Dispose of any packaging materials, and organize your tools for future use.
Take some time to appreciate your newly installed cabinets and their improved functionality. Arrange your kitchen items in your newly organized space and enjoy ample storage for all your kitchen needs.
Remember to maintain your new cabinets regularly to ensure their longevity and continued functionality. Use a mild cleaning solution to wipe down the surfaces of your cabinets, refraining from using harsh chemicals that may harm the finish.
You can enjoy a successful cabinet installation and a transformed kitchen space by following this step-by-step guide and utilizing the expert tips. Congratulations on a job well done!
Conclusion
By following these steps for cabinet installation, you can create a functional and stylish kitchen that reflects your taste and enhances your daily cooking experience. Proper preparation, gathering the necessary tools and materials, finding and marking studs in the wall, and checking for levelness is crucial for a cohesive installation. We must secure the cabinets, add finishing touches, and take safety precautions for a long-lasting, functional kitchen space.
After completing the installation process, it’s time to sit back and enjoy our new kitchen cabinets. We can add personal touches by organizing the cabinets and drawers to our liking. Regularly clean and maintain the cabinets to ensure their longevity and functionality.
FAQ
Q: How do I hang up kitchen cabinets?
A: Hanging up kitchen cabinets can be done following a step-by-step guide. Here’s an easy guide to help you through the process.
Q: What should I do to prepare for cabinet installation?
A: Before starting the cabinet installation process, it’s essential to prepare. Here are some tips:
Q: What tools and materials do I need for cabinet installation?
A: To ensure a successful cabinet installation, gather the following tools and materials:
Q: Do I need to assemble the cabinets before hanging them?
A: If your cabinets require assembly, here’s a brief guide on how to put them together:
Q: How do I find and mark studs for secure cabinet installation in the wall?
A: Finding and marking studs is crucial for secure cabinet installation. Follow these steps:
Q: What’s the process for installing upper cabinets?
A: Follow this step-by-step guide for hanging upper kitchen cabinets:
Q: How do I mount the base cabinets?
A: Here’s a step-by-step guide for mounting base kitchen cabinets:
Q: How do I secure cabinets together and add finishing touches?
A: To create a cohesive unit, follow these steps for securing cabinets together:
Q: How do I check for level and make adjustments during cabinet installation?
A: Checking for levelness and adjusting is crucial for a professional-looking installation. Here’s how:
Q: What are the final steps and safety precautions for cabinet installation?
A: Ensure a successful cabinet installation by following these final steps and safety precautions:
Q: How do I clean up after installation and enjoy my new kitchen cabinets?
A: After installation, clean up and enjoy your new kitchen cabinets with these tips:

It’s me, Amber Hayden, the heart and soul behind SagarmathaOnlineMedia.com. From a young age, I’ve been head over heels for everything home-related, from interior decor to gardening. I’m the type who can’t resist a well-crafted piece of furniture, and I firmly believe that a home isn’t complete without a pet or two. But it’s not just about creating pretty spaces for me. I’m all about making homes that tell a story reflecting the people living there. SagarmathaOnlineMedia.com is my way of sharing this passion with you. Whether you’re looking for tips to jazz up your living room, advice on pet care, or ideas to make your garden bloom, I’m here to help. So, let’s embark on this journey together and make your house a home!