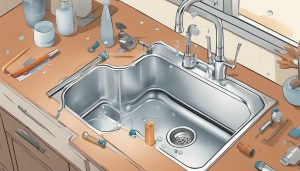
Are you tired of your old, worn-out kitchen countertops? Painting them is a cost-effective way to give your kitchen a refreshed look without breaking the bank. In this article, we will guide you on how to paint your kitchen countertops step-by-step for a successful DIY kitchen countertop painting project.
Key Takeaways
- Painting your kitchen countertops is a cost-effective way to give your kitchen a refreshed look.
- Proper preparation is key to achieving a successful outcome.
- Choose the right paint and primer for your kitchen countertops.
- Seal and protect your painted countertops for longevity.
- Care and maintain your newly painted kitchen countertops for long-lasting durability.
Materials Needed for Painting Kitchen Countertops
If you’re looking to give your kitchen a fresh new look without breaking the bank, painting your countertops is a great DIY project to consider. Here are some essential materials you will need for the job:
| Materials | Usage |
|---|---|
| Painter’s tape | Used to protect areas around the countertop from paint |
| Sandpaper (220-grit) | Used to roughen the surface and create a better bond with the paint |
| Primer | Used to create a base layer for the paint to adhere to |
| Paint | Choose the best paint for kitchen countertops, such as an oil-based or acrylic paint designed for high-traffic areas |
| Paint rollers and brushes | Used to apply the paint to the countertop surface |
| Sealer | Used to protect the paint and ensure it lasts as long as possible |
When it comes to choosing the best paint for kitchen countertops, consider the type of material your countertops are made of and the level of use they receive. Look for a durable, long-lasting paint that will stand up to heat and wear and tear.
If you’re on a tight budget, there are affordable countertop painting techniques you can use. Rather than replacing your entire countertop, consider painting small areas or accent pieces instead. You can also opt for a faux finish or stencil design to add some extra visual interest without breaking the bank.
Preparing Your Kitchen Countertops for Painting
Before you begin painting your kitchen countertops, it’s important to properly prepare the surface. This will ensure the best results and make your new countertop finish last longer. Here are some kitchen countertop makeover ideas and countertop painting tips to guide you through the preparation process:
Clear the Countertops
The first step in preparing your countertops for painting is to remove all items from the surface. Take everything off and store it safely away from the work area.
Clean the Countertops
Once the countertops are clear, it’s time to clean them thoroughly. Use a mild detergent and warm water to remove any grease or dirt that may be covering the surface. Rinse the countertops well to ensure all soap has been removed.
Repair Any Damage
If there are any chips or scratches on your countertops, now is the time to repair them. Use a filler to level out the surface and sand the area until it’s smooth.
Sand the Countertops
Next, sand the entire surface of the countertop using fine-grit sandpaper. This will help the primer and paint adhere properly. Be sure to remove any dust or debris after sanding.
Apply Painter’s Tape
Finally, apply painter’s tape to the edges of the countertops and anywhere else you want to protect from paint. This will ensure a clean and tidy finish.
Following these kitchen countertop makeover ideas and countertop painting tips will help ensure a smooth and successful painting process.
Cleaning and Sanding Your Countertops
Before you start painting your kitchen countertops, it is important to clean and sand them thoroughly. This will help ensure that the primer and paint adhere properly. Follow these countertop painting tips for a smooth process:
Cleaning Your Countertops
Begin by cleaning your countertops with a gentle cleaner and warm water. Avoid using abrasive cleaners, as they can scratch the surface. Rinse the countertops thoroughly with clean water and allow them to dry completely.
Sanding Your Countertops
Using a sanding sponge or sandpaper, gently sand the surface of your countertops. This will help to create a rough surface that will allow the primer and paint to adhere better. Be sure to sand away any rough spots or bumps, and wipe the surface clean with a damp cloth to remove dust and debris.
Remember, proper preparation is key to a successful DIY kitchen countertop painting project. Taking the time to clean and sand your countertops will help ensure a beautiful and long-lasting finish.
Applying Primer to Your Countertops
Before painting your kitchen countertops, it is crucial to apply a coat of high-quality primer. This will ensure that the paint adheres properly and creates a smooth, even finish. Here is a step-by-step guide to applying primer to your kitchen countertops:
- Start by thoroughly cleaning and sanding your countertops, as outlined in the previous section.
- Next, apply painter’s tape to any areas you want to protect from the primer.
- Use a paintbrush or roller to apply the primer to your countertops. Be sure to work in thin, even coats, and avoid overloading the brush or roller.
- Allow the primer to dry completely, according to the manufacturer’s instructions. This usually takes anywhere from 1-4 hours.
- If necessary, sand the surface lightly with fine-grit sandpaper before applying a second coat of primer.
- Repeat the above steps for any additional coats of primer. Two to three coats of primer are usually sufficient.
When choosing a primer for your kitchen countertops, look for a high-quality product specifically designed for use on non-porous surfaces such as laminate or tile. Two of the most popular types of primer for countertop painting are oil-based and water-based. While oil-based primers tend to provide better adhesion and durability, they are also more difficult to clean up and often have a strong odor. Water-based primers, on the other hand, are easier to use and clean up, but may not be as durable in the long run.
By following these steps and using the right primer, you can achieve a professional-looking finish on your newly painted kitchen countertops.
Painting Your Countertops
Now that your countertops are cleaned, sanded, and primed, it’s time to start painting! Follow these steps for a successful DIY kitchen countertop painting project:
- Choose the right paint: Select a paint specifically designed for countertops and follow the manufacturer’s instructions for application. Consider using a paint with a gloss or semi-gloss finish for added durability and a polished look.
- Start painting: Use a foam roller or paintbrush to apply the paint evenly across the surface of the countertop. Work in sections, starting from one end of the countertop and working your way to the other end.
- Apply multiple coats: Depending on the type of paint you’re using, you may need to apply multiple coats. Allow each coat to dry completely before applying the next one.
- Let it dry: Once you’ve applied the final coat of paint, allow your countertops to dry overnight before proceeding to the sealing step.
Remember, the key to a successful DIY kitchen countertop painting project is patience and attention to detail. Take your time and make sure each coat of paint is applied smoothly and evenly for a polished look.
Sealing and Protecting Your Painted Countertops
After you have finished painting your kitchen countertops, it is important to properly seal and protect them to ensure their longevity. Follow these steps:
- Allow the paint to dry completely before sealing. This usually takes around 24-48 hours.
- Apply a water-based, non-yellowing sealer in thin, even coats using a foam roller or brush. Be sure to follow the manufacturer’s instructions for application and drying time.
- Allow the sealer to dry for at least 24 hours before using your countertops.
- Avoid placing hot or sharp objects directly on the surface to prevent scratches and burns. Use trivets or hot pads instead.
- Clean your countertops regularly with a mild soap and water, avoiding abrasive cleaners and scrubbers that could damage the surface.
By properly sealing and caring for your painted kitchen countertops, you can enjoy a beautiful and durable surface for years to come.
Curing and Caring for Your Painted Countertops
After painting your kitchen countertops, it is important to properly cure and care for them to ensure their longevity. Here are some tips for maintaining your newly painted countertops:
Allow Sufficient Curing Time
It is essential to allow your newly painted countertops sufficient curing time before using them. This will prevent any damage to the finish and ensure that the paint fully adheres to the surface. Most paints require at least 24 hours to cure, but it is best to check the manufacturer’s instructions.
Avoid Harsh Cleaners
To maintain the finish on your painted countertops, it is important to avoid harsh cleaners that can damage the surface. Instead, use a gentle, non-abrasive cleaner and a soft cloth to wipe down the countertops.
Use Cutting Boards
While painted countertops are durable, they can still be prone to scratches and chips. To prevent damage, always use cutting boards and avoid cutting directly on the surface.
Avoid Heat Exposure
Excessive heat exposure can damage the finish on your painted countertops, so it is important to avoid placing hot pots and pans directly on the surface. Instead, use trivets or hot pads to protect the countertop.
Regular Maintenance
To keep your painted countertops looking their best, it is important to perform regular maintenance. Regularly wipe down the surface with a soft cloth and gentle cleaner, and inspect the surface for any chips or scratches that may require touch-up paint.
By following these tips, you can ensure that your newly painted kitchen countertops will remain durable and beautiful for years to come.
Troubleshooting Common Countertop Painting Issues
Despite your best efforts, it’s possible to encounter some problems during your DIY kitchen countertop painting project. Here are some common issues and helpful countertop painting tips to overcome them:
Bubbles or Bumps
One possible issue is the appearance of bubbles or bumps in your painted countertops. This can be caused by the presence of dust or debris on the surface or applying too much paint at once. To fix this, lightly sand the affected area and wipe away any debris. Then, apply a thin coat of paint and allow it to dry before adding additional layers.
Uneven Coverage
Another issue you may encounter is uneven coverage, where some spots appear lighter or darker than others. This can occur if you don’t apply enough paint or if you apply it unevenly. To fix this, sand the affected area lightly and apply an additional coat of paint.
Peeling or Chipping
If your new paint is peeling or chipping, it may be due to inadequate cleaning or improper surface preparation. To fix this, sand the affected area and remove all debris. Then, apply a new layer of primer and allow it to dry completely before adding additional paint layers.
Streaks or Runs
Finally, streaks or runs can occur if you apply too much paint in one area or if you don’t allow sufficient drying time between coats. To fix this, sand the affected area lightly and allow it to dry completely. Then, apply a thin layer of paint, allowing it to dry completely before applying additional layers.
By following these countertop painting tips and troubleshooting advice, you can overcome common issues and achieve a successful DIY kitchen countertop painting project.
Conclusion
In conclusion, painting your kitchen countertops can be a fun and rewarding DIY project. Following the steps outlined in this guide and incorporating our countertop painting tips will help ensure a successful outcome. It’s important to remember that proper preparation is key to achieving a professional-looking finish.
By using the best paint for kitchen countertops and affordable countertop painting techniques, you can transform your kitchen without breaking the bank. Sealing and protecting your newly painted countertops is also crucial for maintaining their longevity. And don’t forget to properly cure and care for your painted countertops to ensure their durability.
Get Started Today!
If you’re ready to embark on your own kitchen countertop painting adventure, we encourage you to dive in! Remember, if any common countertop painting issues arise, consult our troubleshooting tips and solutions to overcome them. With the right materials and proper preparation, you can create a beautiful and functional kitchen space that suits your unique style and needs.
Thank you for reading our guide on how to paint your kitchen countertops. We hope you found it helpful and informative. Happy painting!
FAQ
Q: What materials do I need to paint my kitchen countertops?
A: To paint your kitchen countertops, you will need the following materials:
- Primer
- Paint
- Paintbrush or roller
- Sandpaper
- Painter’s tape
- Degreaser or household cleaner
- Tack cloth
- Sealer (optional)
Q: How do I prepare my kitchen countertops for painting?
A: To prepare your kitchen countertops for painting, follow these steps:
- Clean the countertops thoroughly with a degreaser or household cleaner.
- Remove any hardware or fixtures from the countertops.
- Sand the countertops to create a rough surface for the paint to adhere to.
- Wipe away any dust with a tack cloth.
Q: Do I need to apply primer before painting my countertops?
A: Yes, it is recommended to apply a primer before painting your kitchen countertops. The primer helps the paint adhere better and provides a smooth surface for the paint to be applied.
Q: How do I seal and protect my painted countertops?
A: To seal and protect your painted kitchen countertops, follow these steps:
- Allow the paint to fully dry and cure according to the manufacturer’s instructions.
- Apply a clear sealant or countertop wax to protect the paint from scratches and stains.
- Regularly clean and maintain the countertops to prolong their durability.
Q: What are some common issues I may encounter when painting my countertops?
A: Some common issues that may arise when painting kitchen countertops include:
- Uneven paint application
- Paint peeling or chipping
- Sticky or tacky finish
- Color bleeding or staining
- Difficulty achieving a smooth finish
Q: How can I troubleshoot these countertop painting issues?
A: To troubleshoot common countertop painting issues, try the following solutions:
- Sand and reapply paint to fix uneven application.
- Ensure proper surface preparation to prevent paint peeling or chipping.
- Allow sufficient drying time between coats to avoid a sticky or tacky finish.
- Use a primer or sealer to prevent color bleeding or staining.
- Apply thin, even coats of paint and use a high-quality brush or roller for a smooth finish.

It’s me, Amber Hayden, the heart and soul behind SagarmathaOnlineMedia.com. From a young age, I’ve been head over heels for everything home-related, from interior decor to gardening. I’m the type who can’t resist a well-crafted piece of furniture, and I firmly believe that a home isn’t complete without a pet or two. But it’s not just about creating pretty spaces for me. I’m all about making homes that tell a story reflecting the people living there. SagarmathaOnlineMedia.com is my way of sharing this passion with you. Whether you’re looking for tips to jazz up your living room, advice on pet care, or ideas to make your garden bloom, I’m here to help. So, let’s embark on this journey together and make your house a home!